

Like many, it was the last series of The Great British Sewing Bee that captured my interest and enthusiasm for threading a needle. This weekend, continuing on from the success of my zippy top, I put myself to the test by beginning my first ever dress.
I’d bought my fabric a month or so ago, in a print I really liked and a slightly stretchy, jersey type fabric. At £6 per metre, rather than the £12 I’d initially admired, I could afford to make the odd mistake. Just before the dress making classes I’d been looking forward to were about to begin, I was advised that they were postponed due to insufficient interest. A couple of weeks later, they were cancelled completely as the owner of the business had decided to relocate. Good for her, disappointing for me. However, having Nat at Threads and Bobbins as a self-taught inspiration, this weekend I took the plunge.
I opted for what appeared to be the simplest version of the 6022 pattern (A) shown here, and did NOT read right through the instructions, as I was fairly sure they would sound overly complicated or tedious and probably put me off. Instead. I used improvised weights to weigh down the pattern, while I traced around and cut out the correct size. Wilfie assisted.

I liked that the pattern advised how to lay out the pieces to make the most of the fabric.

The pattern had 6 pieces in total, 2 sleeves, 2 pieces for the back, a long thin rectangle for the binding and the front. I ended up pinning my baking paper templates to the fabric. I have since ordered a rotary cutter AND a fading ink pen which will hopefully speed up this stage.
Once cut out, I had to google stay stitch, then did that across the neck lines. I then had to return to the pattern to find where I should have marked the neckline pleats, and to see which way the folds should go.
I did this then basted across. I used a long running stitch on my machine for basting, which wasn't as slack as I thought it should be, but worked out ok. Next I attached the two back panels together. Then it was time for another first – attaching a short strip of elastic about two thirds of the way down the back. You were supposed to stretch the elastic as you sewed. This worked ok but is not even, but neither is it bad enough for me to contemplate unpicking and redoing. I then sewed the dress at the straps.

I could then hem the sides together, and it suddenly began to look like a dress.
The neckline took the longest, I think due to the fabric it just did not want to stay folded under. As I was attaching it, and sort of sewing in a circle, I spotted that one of the edges had slipped away a little and hadn’t caught, so I re-sewed it once or twice more in places to be sure it was secure. Then I was supposed to make a loop for a button on the back. Loop instructions sounded tricky, so I made a small plait from silver thread.

I stitched on a heart shaped button from my limited button collection, and attached the loop on the other side. I didn’t really check whether they matched up, so unsurprisingly, they didn’t, really, and one side hung lower than the other. As the button is purely decorative and not functional, I just unpicked the sewed on plaited loop, and stitched the slit together.

The sleeves blew my mind a little, as they had pleats AND elastic gathering, AND a hem AND they needed attaching by basting then properly sewing. I was amazed they worked out ok, but they did.
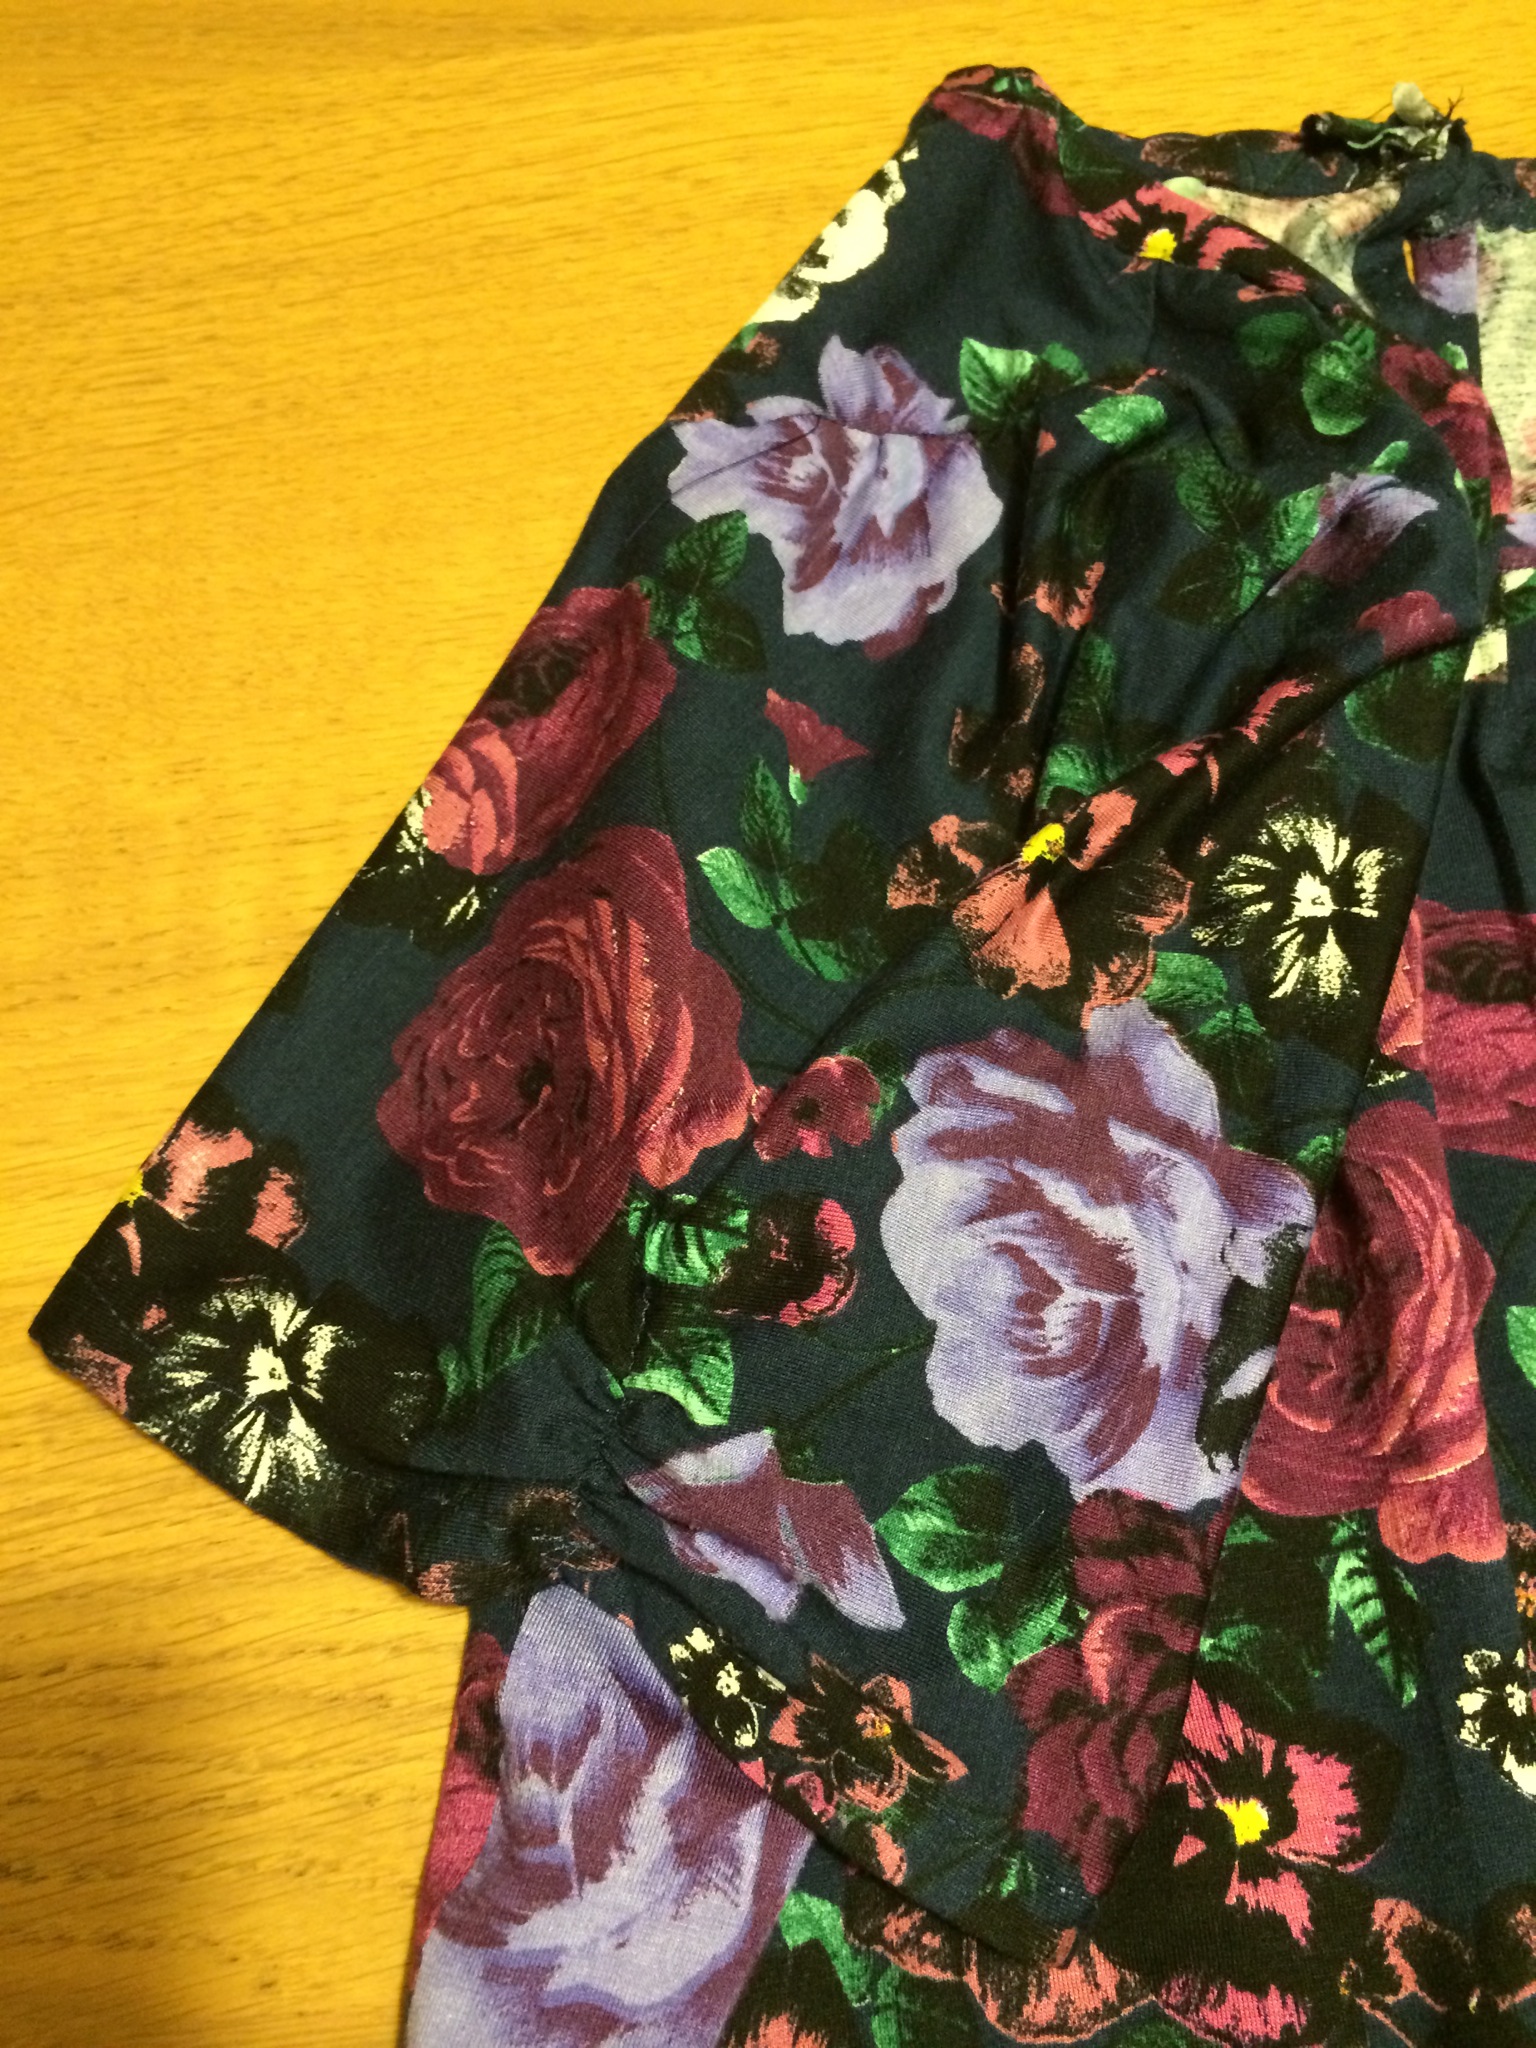
Last of all was the bottom hem. Having gained a bit of confidence, instead of following the instructions and overlocking then using slip stitch to finish, I turned up a half an inch hem, pressed it, turned it up again and then sewed a double line all the way around.


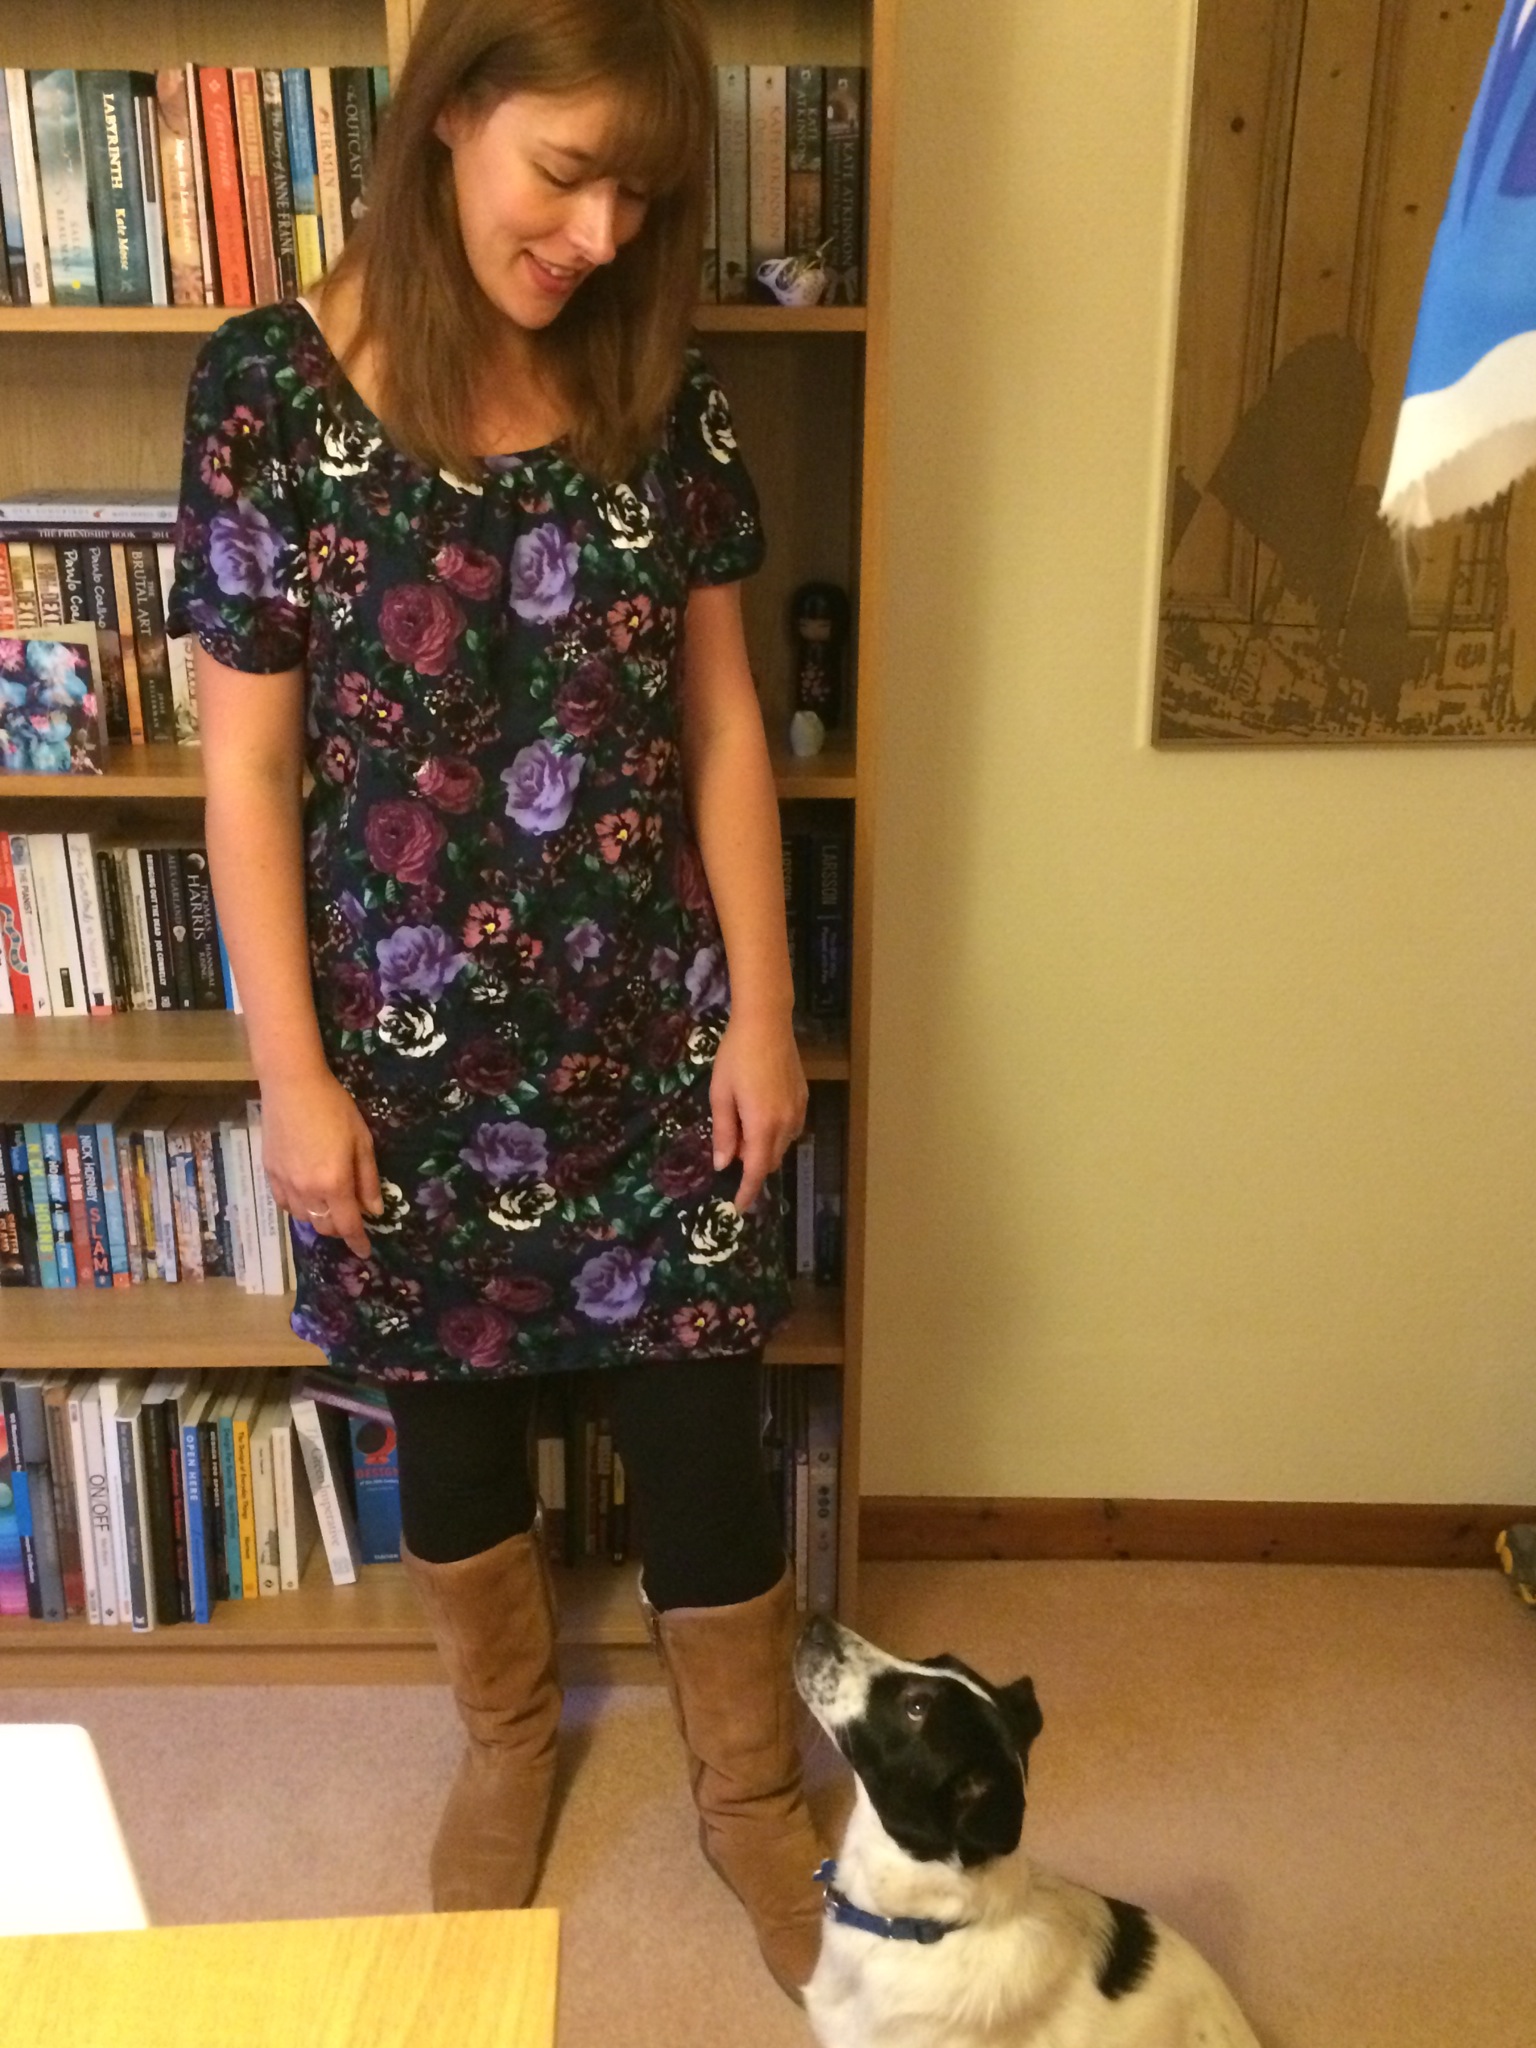
It’s an understatement to say I’m pleased with how this garment turned out. I’m thrilled. It fits well, just fitted enough but not too much. I like the length and I love the print. The neckline has turned out so well considering what a faff it was, and I like the little details on the sleeves and back. I’m already excited, yet still undecided for my next project.

Wow, well done on your first dress! You were brave – I’ve not yet done a dress in stretchy fabric, or with any elastic bits in! But you totally pulled it off!! 🙂
LikeLike
Thank you! The elastic bits got easier after the first and they do add a nice bit of extra detail. Maybe practising on a scrap of fabric to understand the technique would have been a good idea for me though! If I can manage it I am sure you could 🙂
LikeLiked by 1 person
Wow well done, this dress looks gorgeous. Just perfect for autumn!! You could never tell this is a first attempt at making a dress… You should definitely wear it with pride!! X
alifehomespun.wordpress.com
LikeLike
Well done, it looks lovely on you. You’ll be sewing ball gowns in no time:)
LikeLike
Woohoo! This look really nice! Love the fabric and love how Wilf & Oliver helped you along the way 🙂 Well Done you!
LikeLike