During a dog walk a few months ago I ordered this pattern from Amazon.

Though more expensive than other patterns I’ve bought, I liked the style. When I came across the January Monthly Stitch Challenge, it immediately came to mind, along with some dark stretch denim I’d bagged in the post-Christmas Minerva sale. The dress pattern includes a lined bodice, which was ideal for one of my 2015 resolutions. After trawling through my stash with some kind of delicate, ditsy print in mind, I settled on the leftover fabric from my recent cotton kimono top.

I wanted to make view A, with capped sleeves, also lined. The pattern called for understitching, which I had read about before but never done. After checking a tutorial and closely following the pattern instructions, I managed to achieve an understitching finish I was proud of.

I repeated the process for the sleeves, which went well, and was really happy (though suspicious) about how well this make was coming together. I continued following the instructions to baste then insert the sleeves, and here we get to a point where there are no photos. When things don’t go my way the last thing I want is to commit it to history, although I know it’s a shame for before and after purposes. The sleeves just wouldn’t sit right in the bodice. Perhaps, with experience, I would have known how to alter the angle or sewn them on differently to have achieved a more pleasing finish. But I didn’t. And I was all the more annoyed because those sleeves had seemed to have turned out so well, and they were understitched and everything.

I left the dress for the night to mull over the options. Leaving the sleeves on really wasn’t an option, they stuck out and massively overpowered the dress. So it was a choice between trying to alter the (painstakingly) lined sleeves, or unpicking and removing them altogether. None of the options was appealing, but I knew I had to do whatever would render the dress wearable. The next morning I grudgingly removed the sleeves. The pattern included a view that was in fact sleeveless, but as that hadn’t been my intention I had already gone too far, as it were to change this dress to that one. Instead, I felt my only choice was to try and turn under the raw edges and then top stitch, which was annoying as all of the other sections were finished in different, neater ways. A single row of top stitching left the wrong side still trying to twist around, but a second row seemed to secure it.
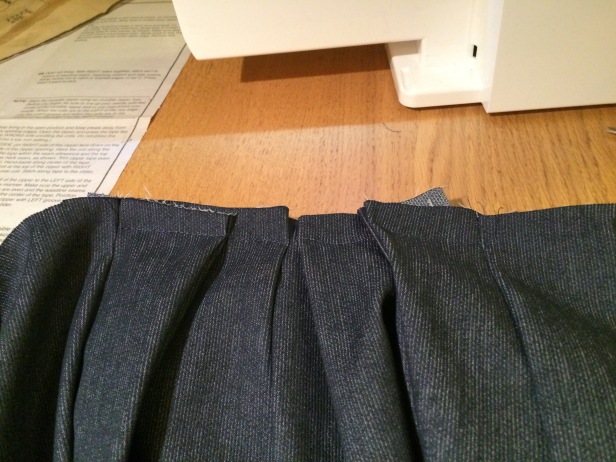
The pleats in the skirt are a lovely feature, but I found it tricky to understand the pattern and diagrams. Once folded they were basted into place before being secured as the bodice was attached to the skirt.

Next it was time to move on to the invisible zipper. Not my forte but it did in fact go quite well. Except once it was in and fastened up so I could assess its invisibility, I noticed how I hadn’t lined the waistline up before inserting the zip.

Oh, and the hem on two of the sections of skirt didn’t line up, but that was probably the least of my worries and fairly easily remedied.

To finish the make, I had to hand sew the lining along the bottom edge using slip stitch. I quite enjoyed this part.

I was also pleased to have some insides of a make that I was happy to show off.

Another make with a number of imperfections, but I’m pretty happy with the finish, inside and out, and I like the fit very much. The pleats and thicker fabric mean that the zip is very tricky to fasten, so I’m hoping it holds out for a while yet.


This is fab! It looks great on you and fits perfectly. The lined bodice is really neat. You’ll almost want to wear it inside out!
My hems often don’t line up, like yours, I’m not sure how it even happens!
LikeLiked by 1 person
Looks great, in fact as if it wasn’t supposed to have sleeves at all ;-)Your innards look incredibly neat, great job 🙂
LikeLiked by 1 person
Nice job inside and out! You managed through it and came out with a lovely dress!
LikeLiked by 1 person
Is it too late to join The Sewing Bee??!!
Love from a proud Mum xxxxxXxx
LikeLiked by 2 people
Such lovely fabric, it’s almost a crime to use it for lining that will never be seen:)
LikeLiked by 1 person
I previously made a kimono from this cotton, so I didn’t feel too bad using most of what was left as lining 🙂 I do love the print though.
LikeLiked by 1 person
I know, but it’s soooo pretty! Dress looks fab as well, btw – forgot to say that!
LikeLiked by 1 person
Thanks! It was only a cheap fabric, which I think makes it a little easier to keep it hidden 🙂
LikeLiked by 1 person