

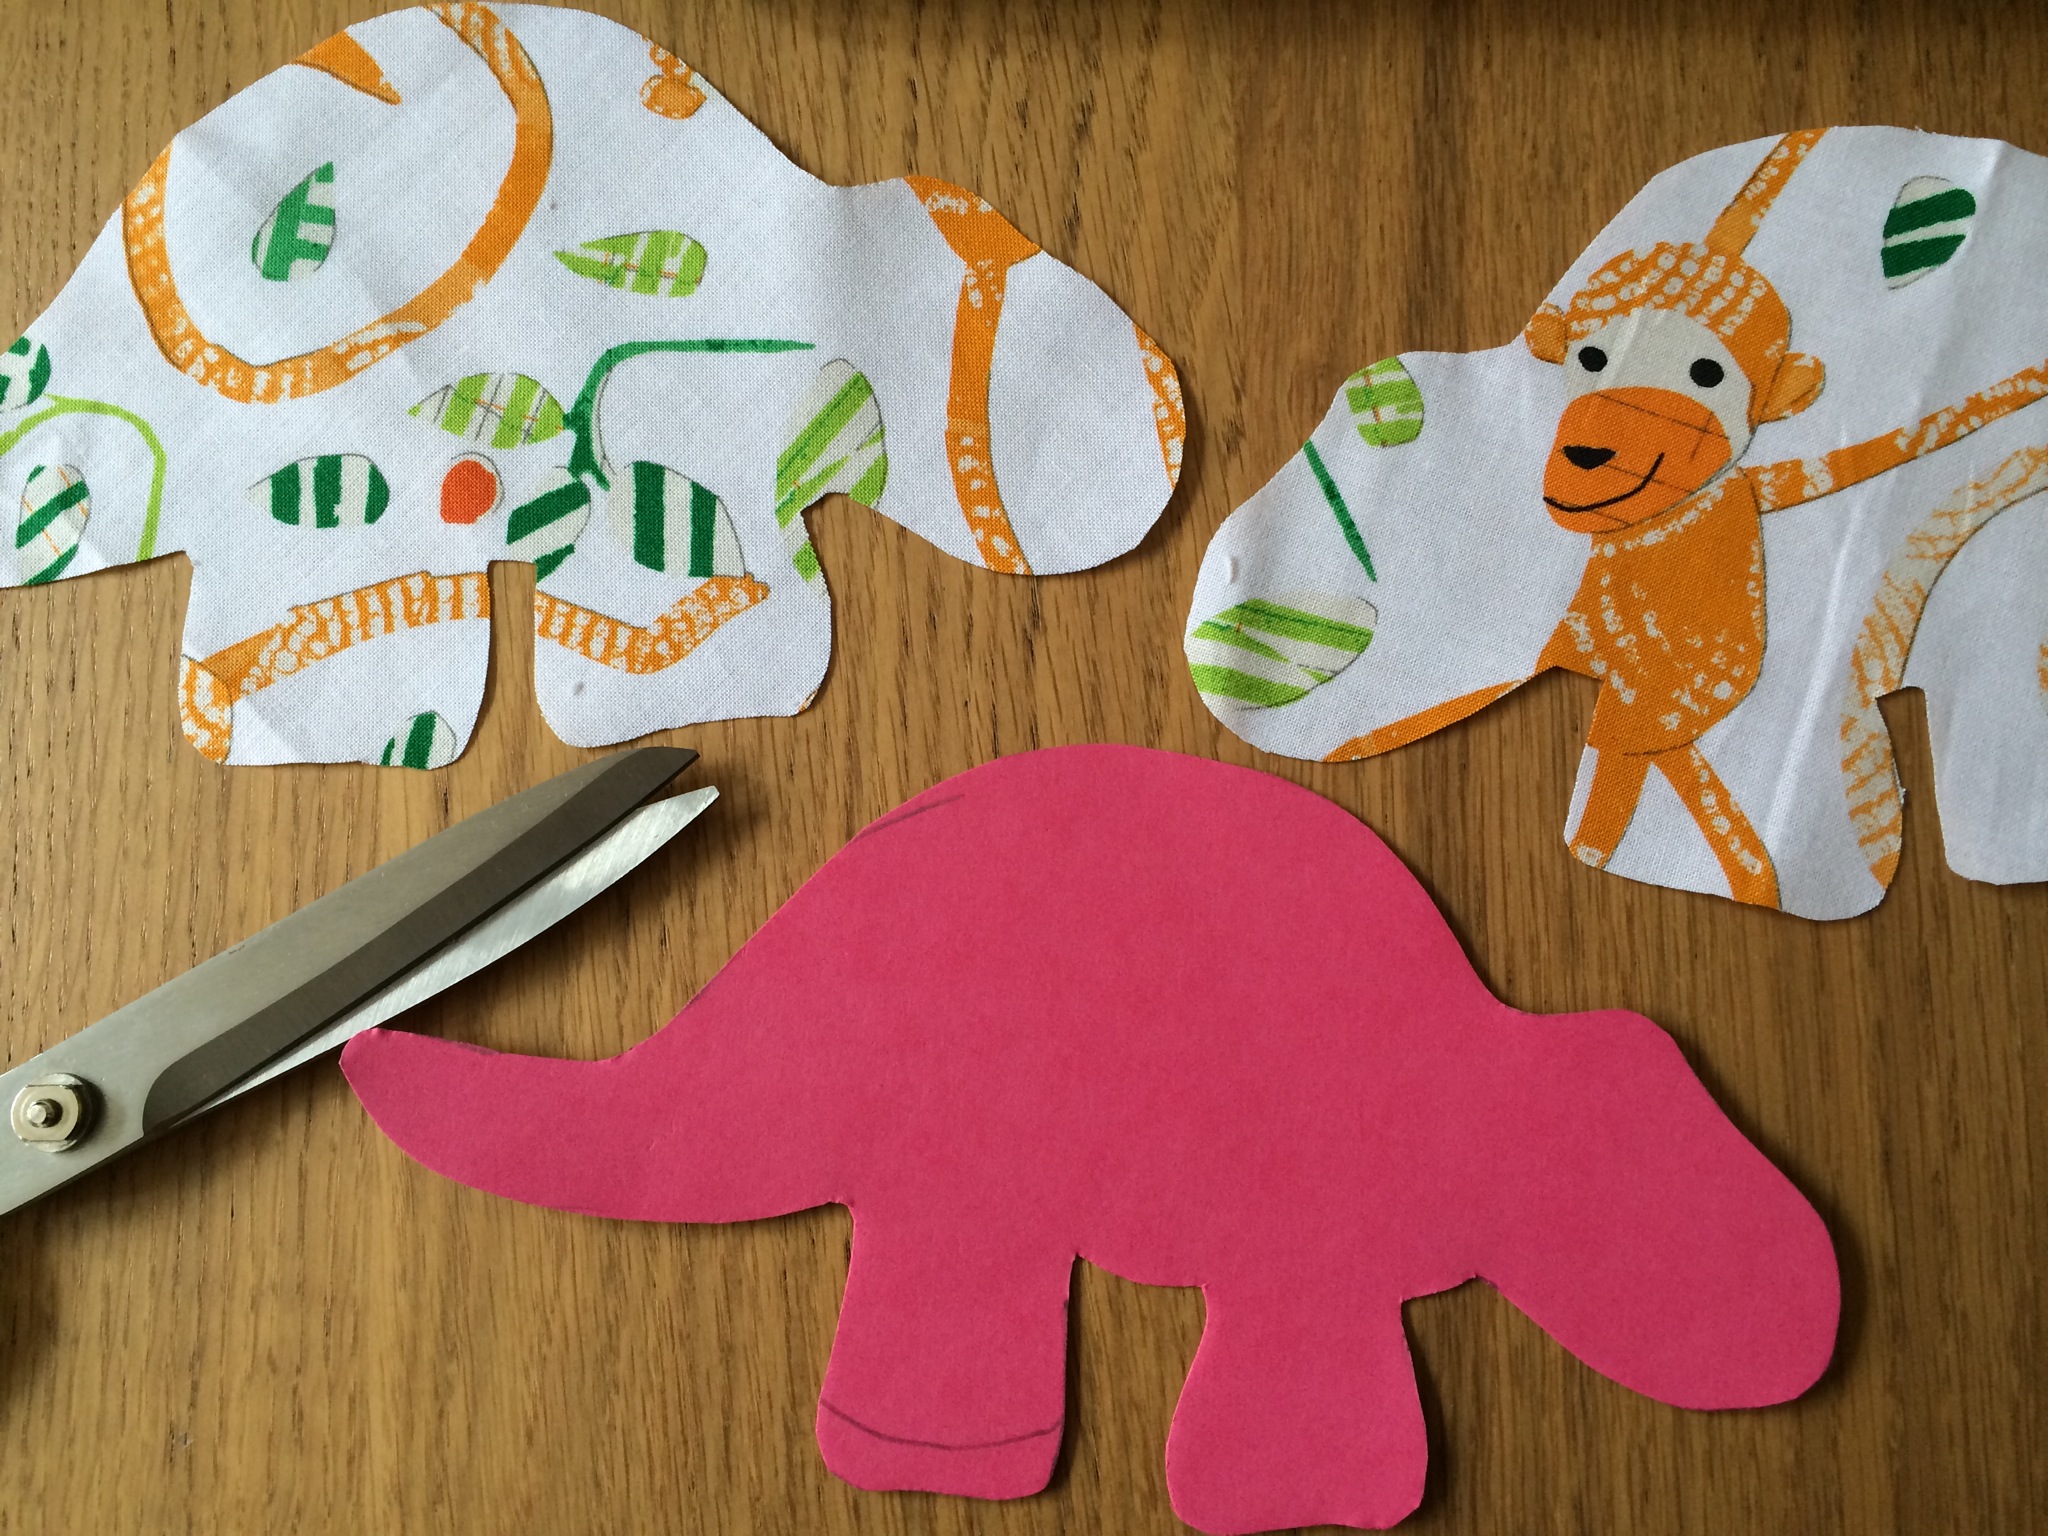
A while ago I pinned this onto my Stitch in Time board. Today I had a go, to create a little gift to accompany one of the sets of burp cloths made yesterday.
I copied the pattern freehand onto card, guessing what size it should be and adding seam allowance. I then cut two copies, being sure to flip the template over for one so that I had the two right sides of fabric.
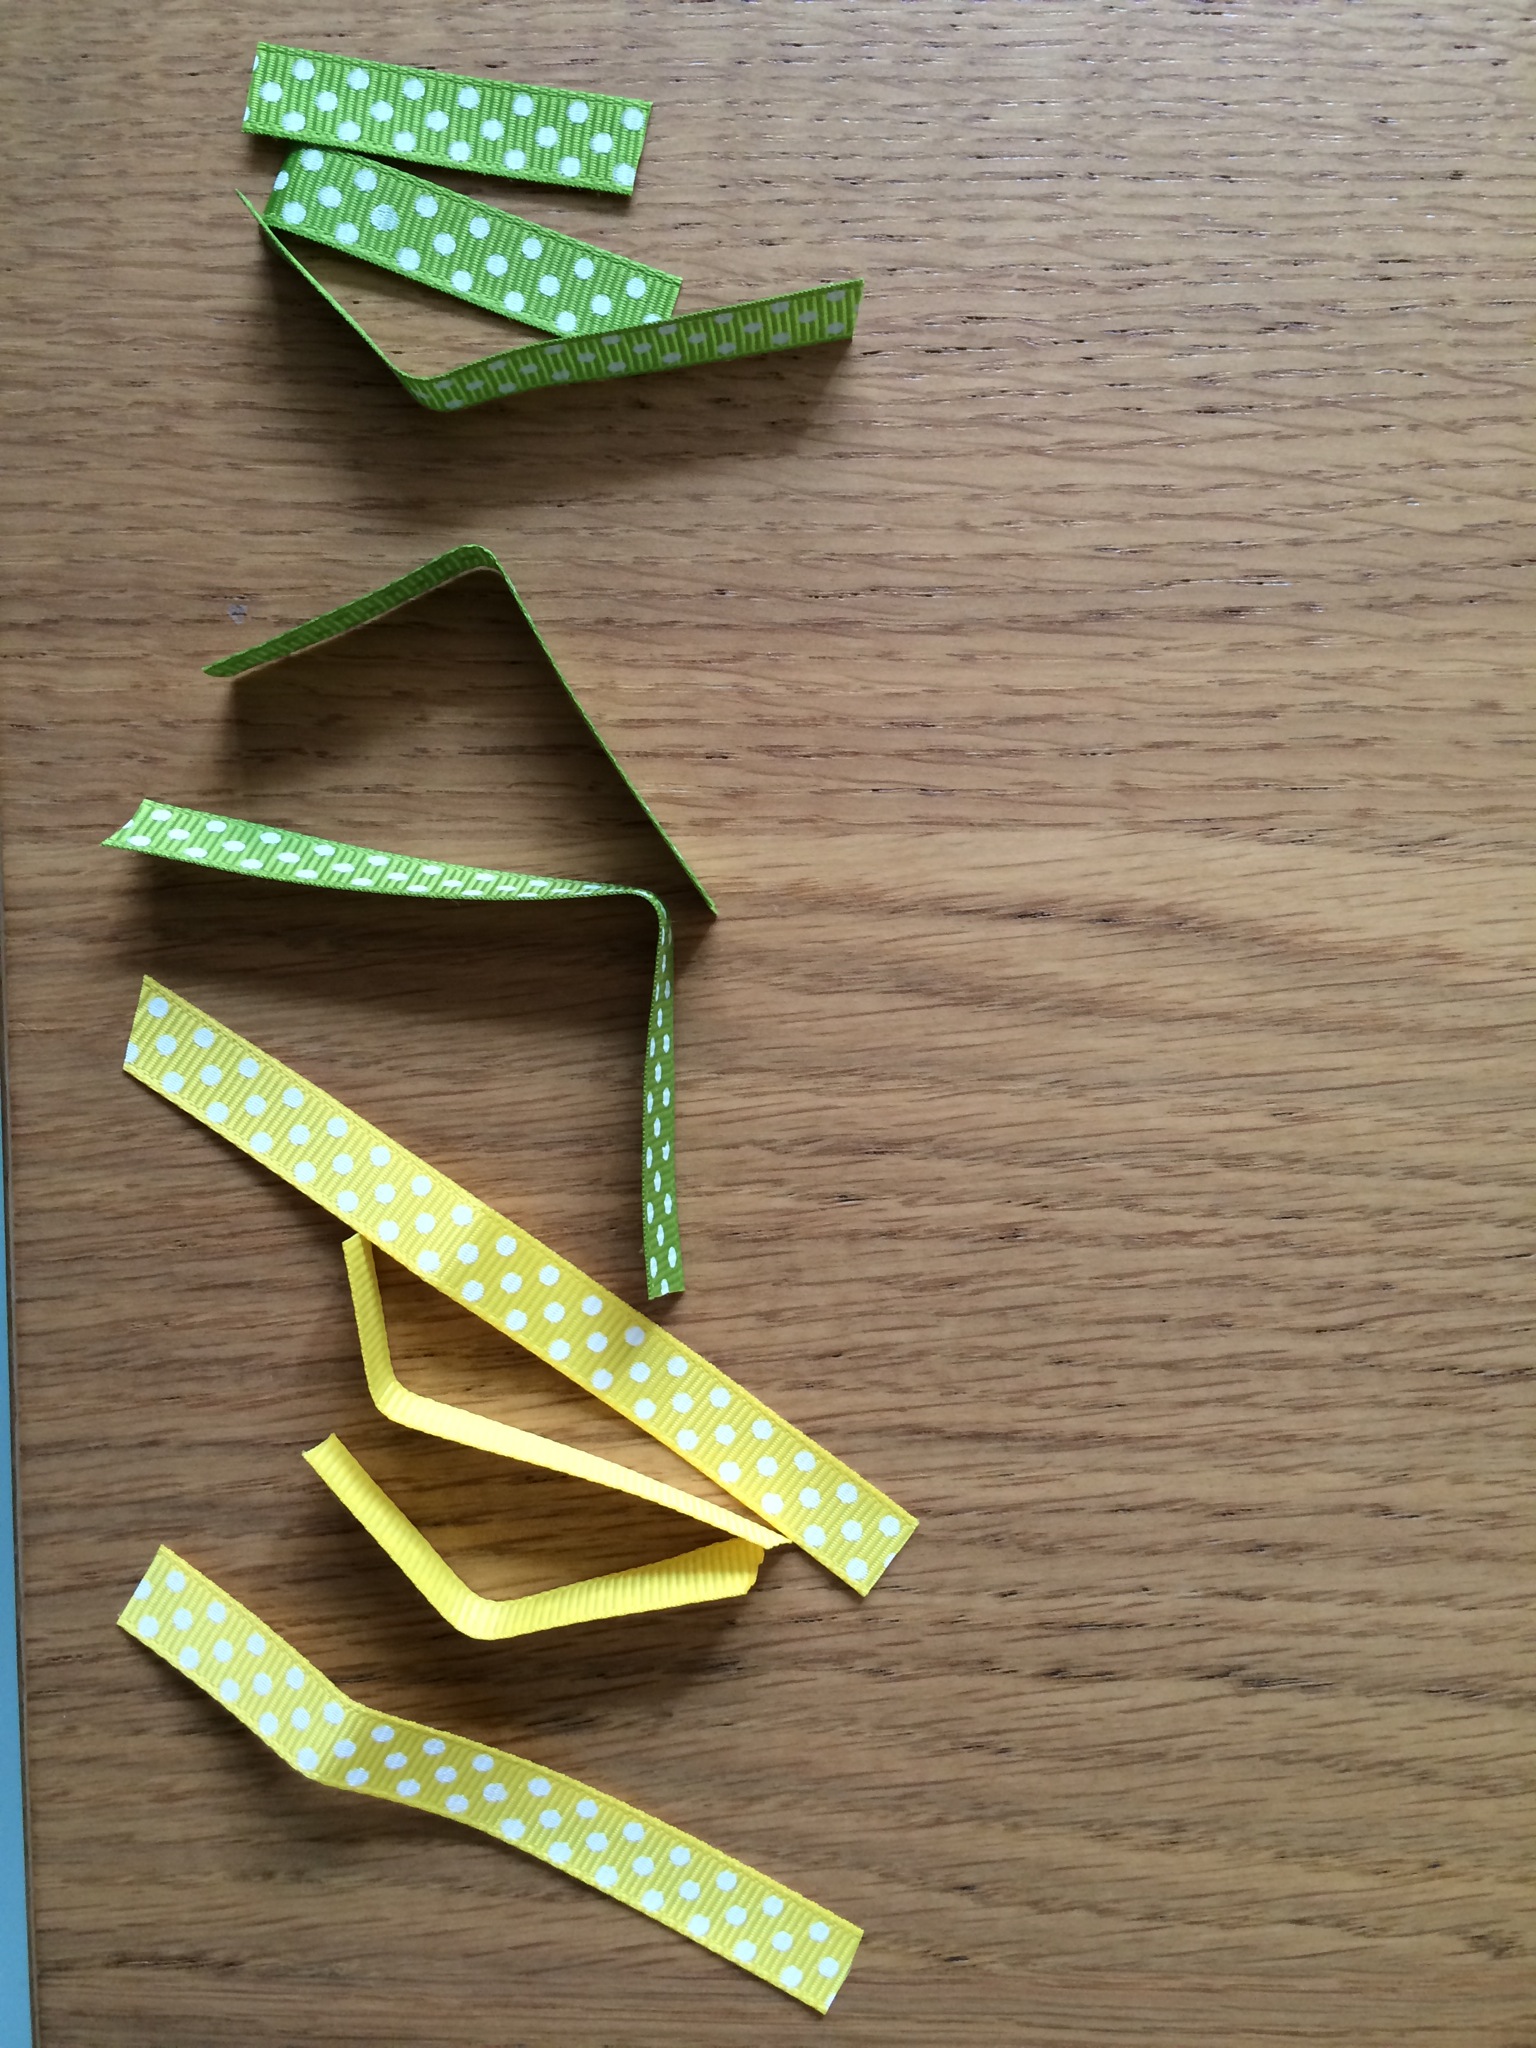
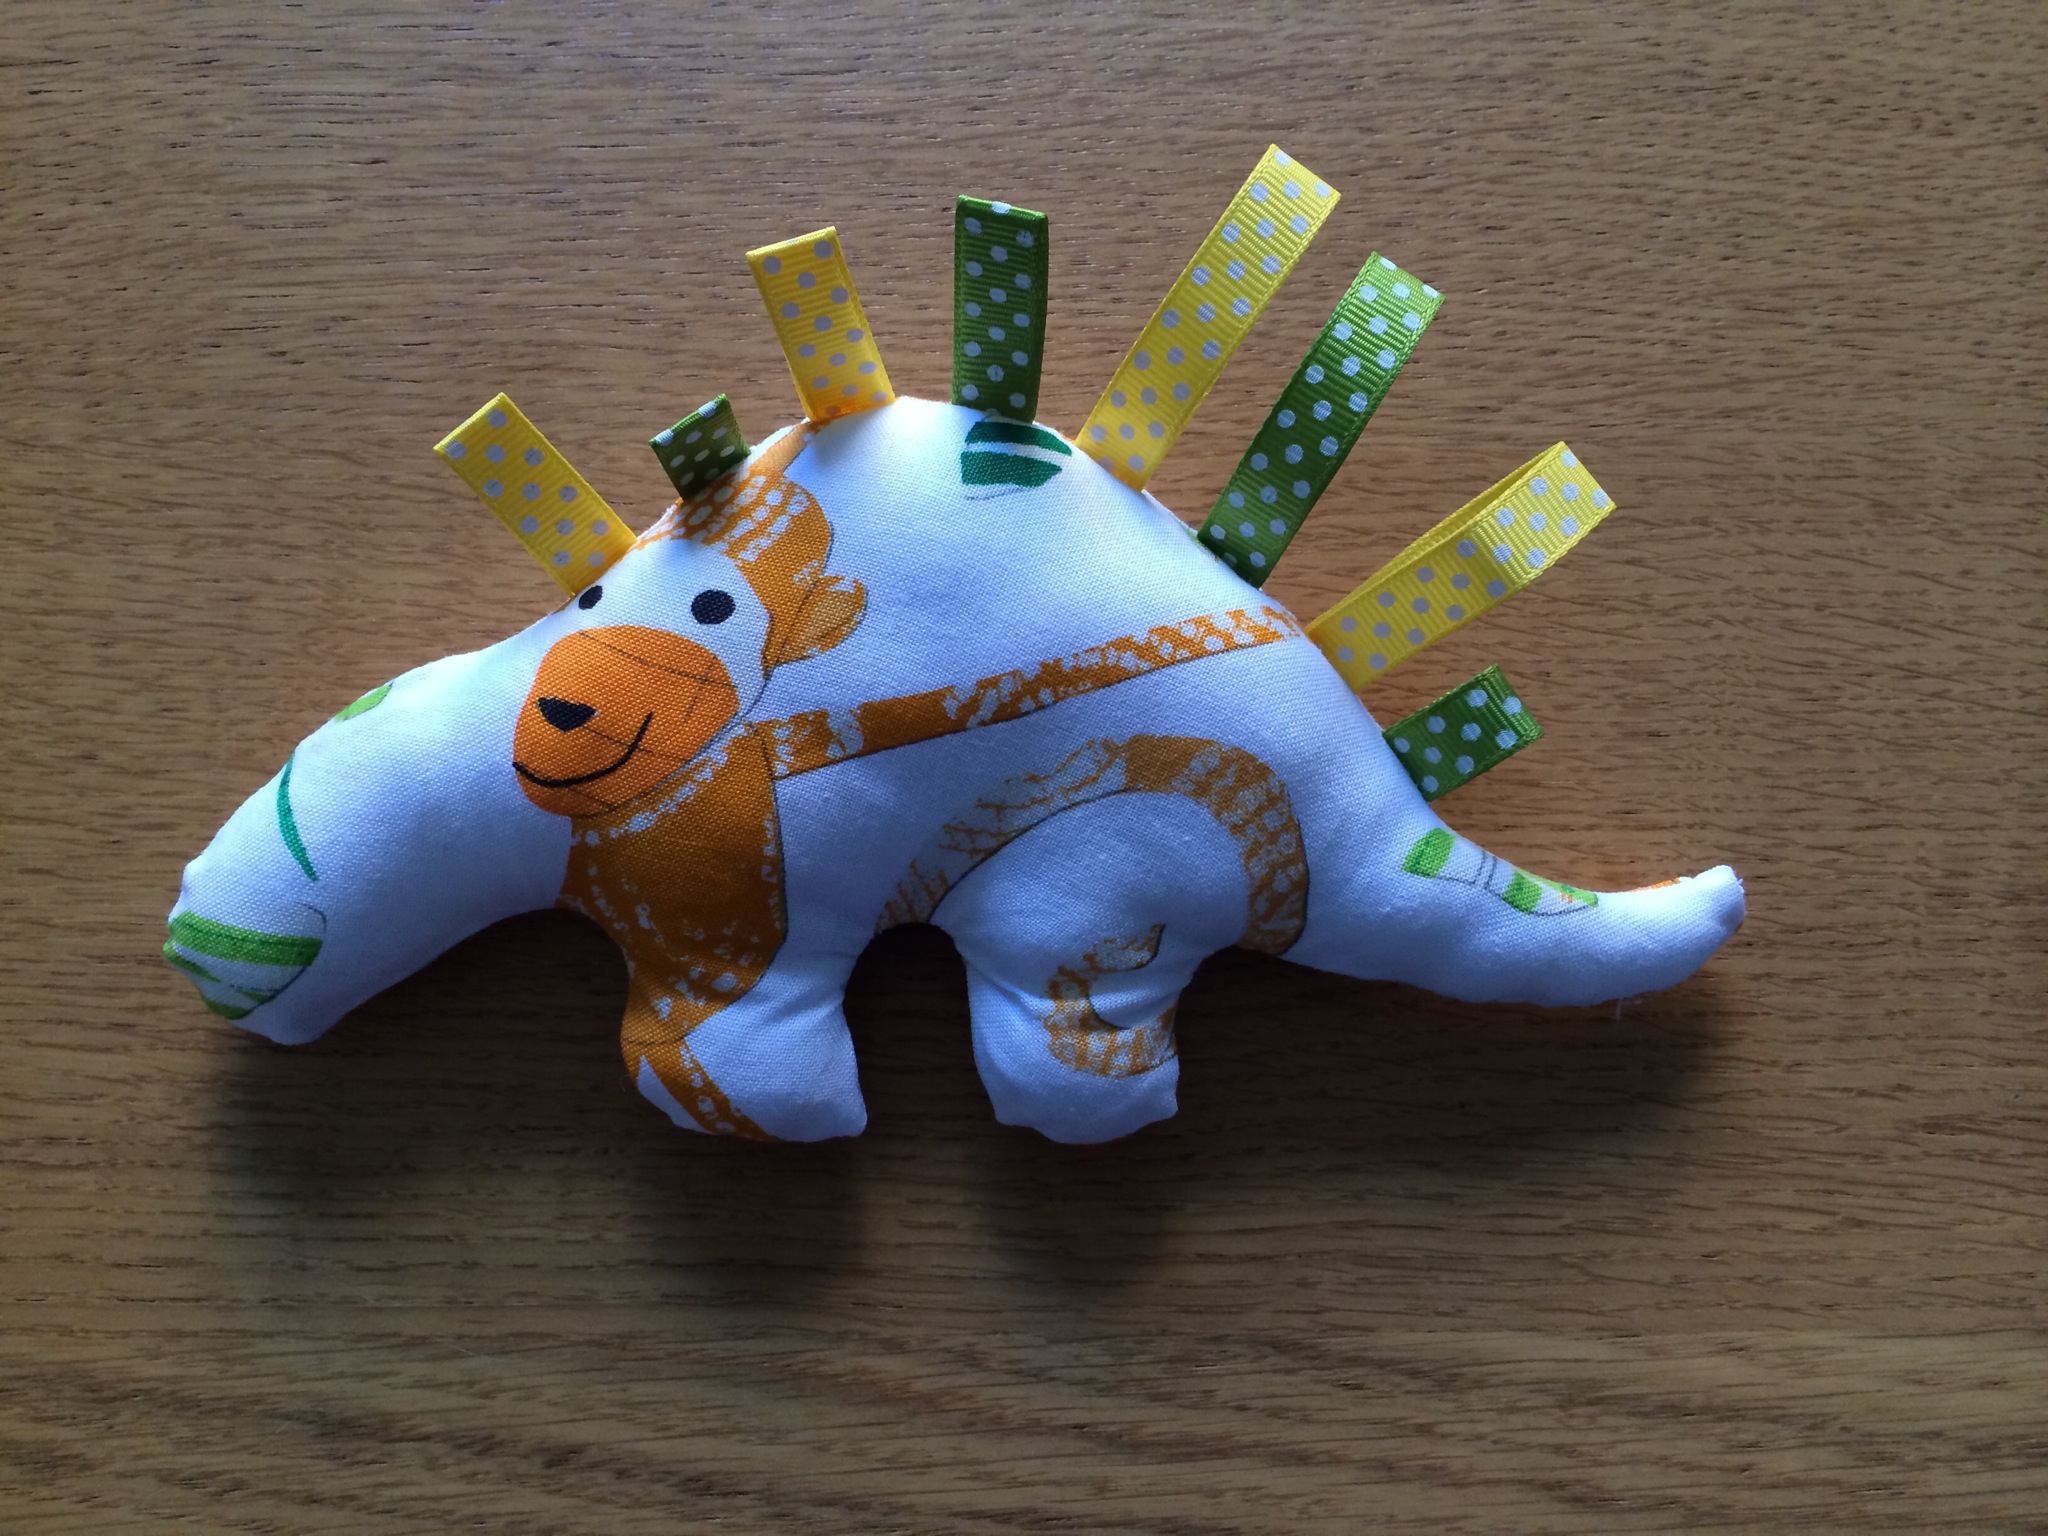
I then cut out eight or nine pieces of ribbon, in colours that matched my fabric. I used some of the same fabric I used for the burp cloths.
Alternating the two colours, I pinned them pointing downwards inside my two pieces of fabric, which were now right side in. It felt like this wasn’t right as I imagined I would see them sticking up like they do when it’s finished, so here I had to be patient and cross my fingers.

I then continued pinning around the rest of the edge of the dino, leaving just a gap near the tail. I machine sewed around the edge, and went over the ribbon section twice, thinking this part would be especially likely to be tugged. I wish I’d left a slightly bigger gap, but I managed to wiggle my little finger around and gradually pulled it through until it was the right way around. Then it was ready to press. Since last time I was forced to stuff my Jack rabbit with cotton wool, this time I made sure I used wadding, or quilting at least (is there a difference?). Having left a bigger hole would have again been helpful, and stuffing the dino was definitely the most time consuming part of the process, though not at all difficult.
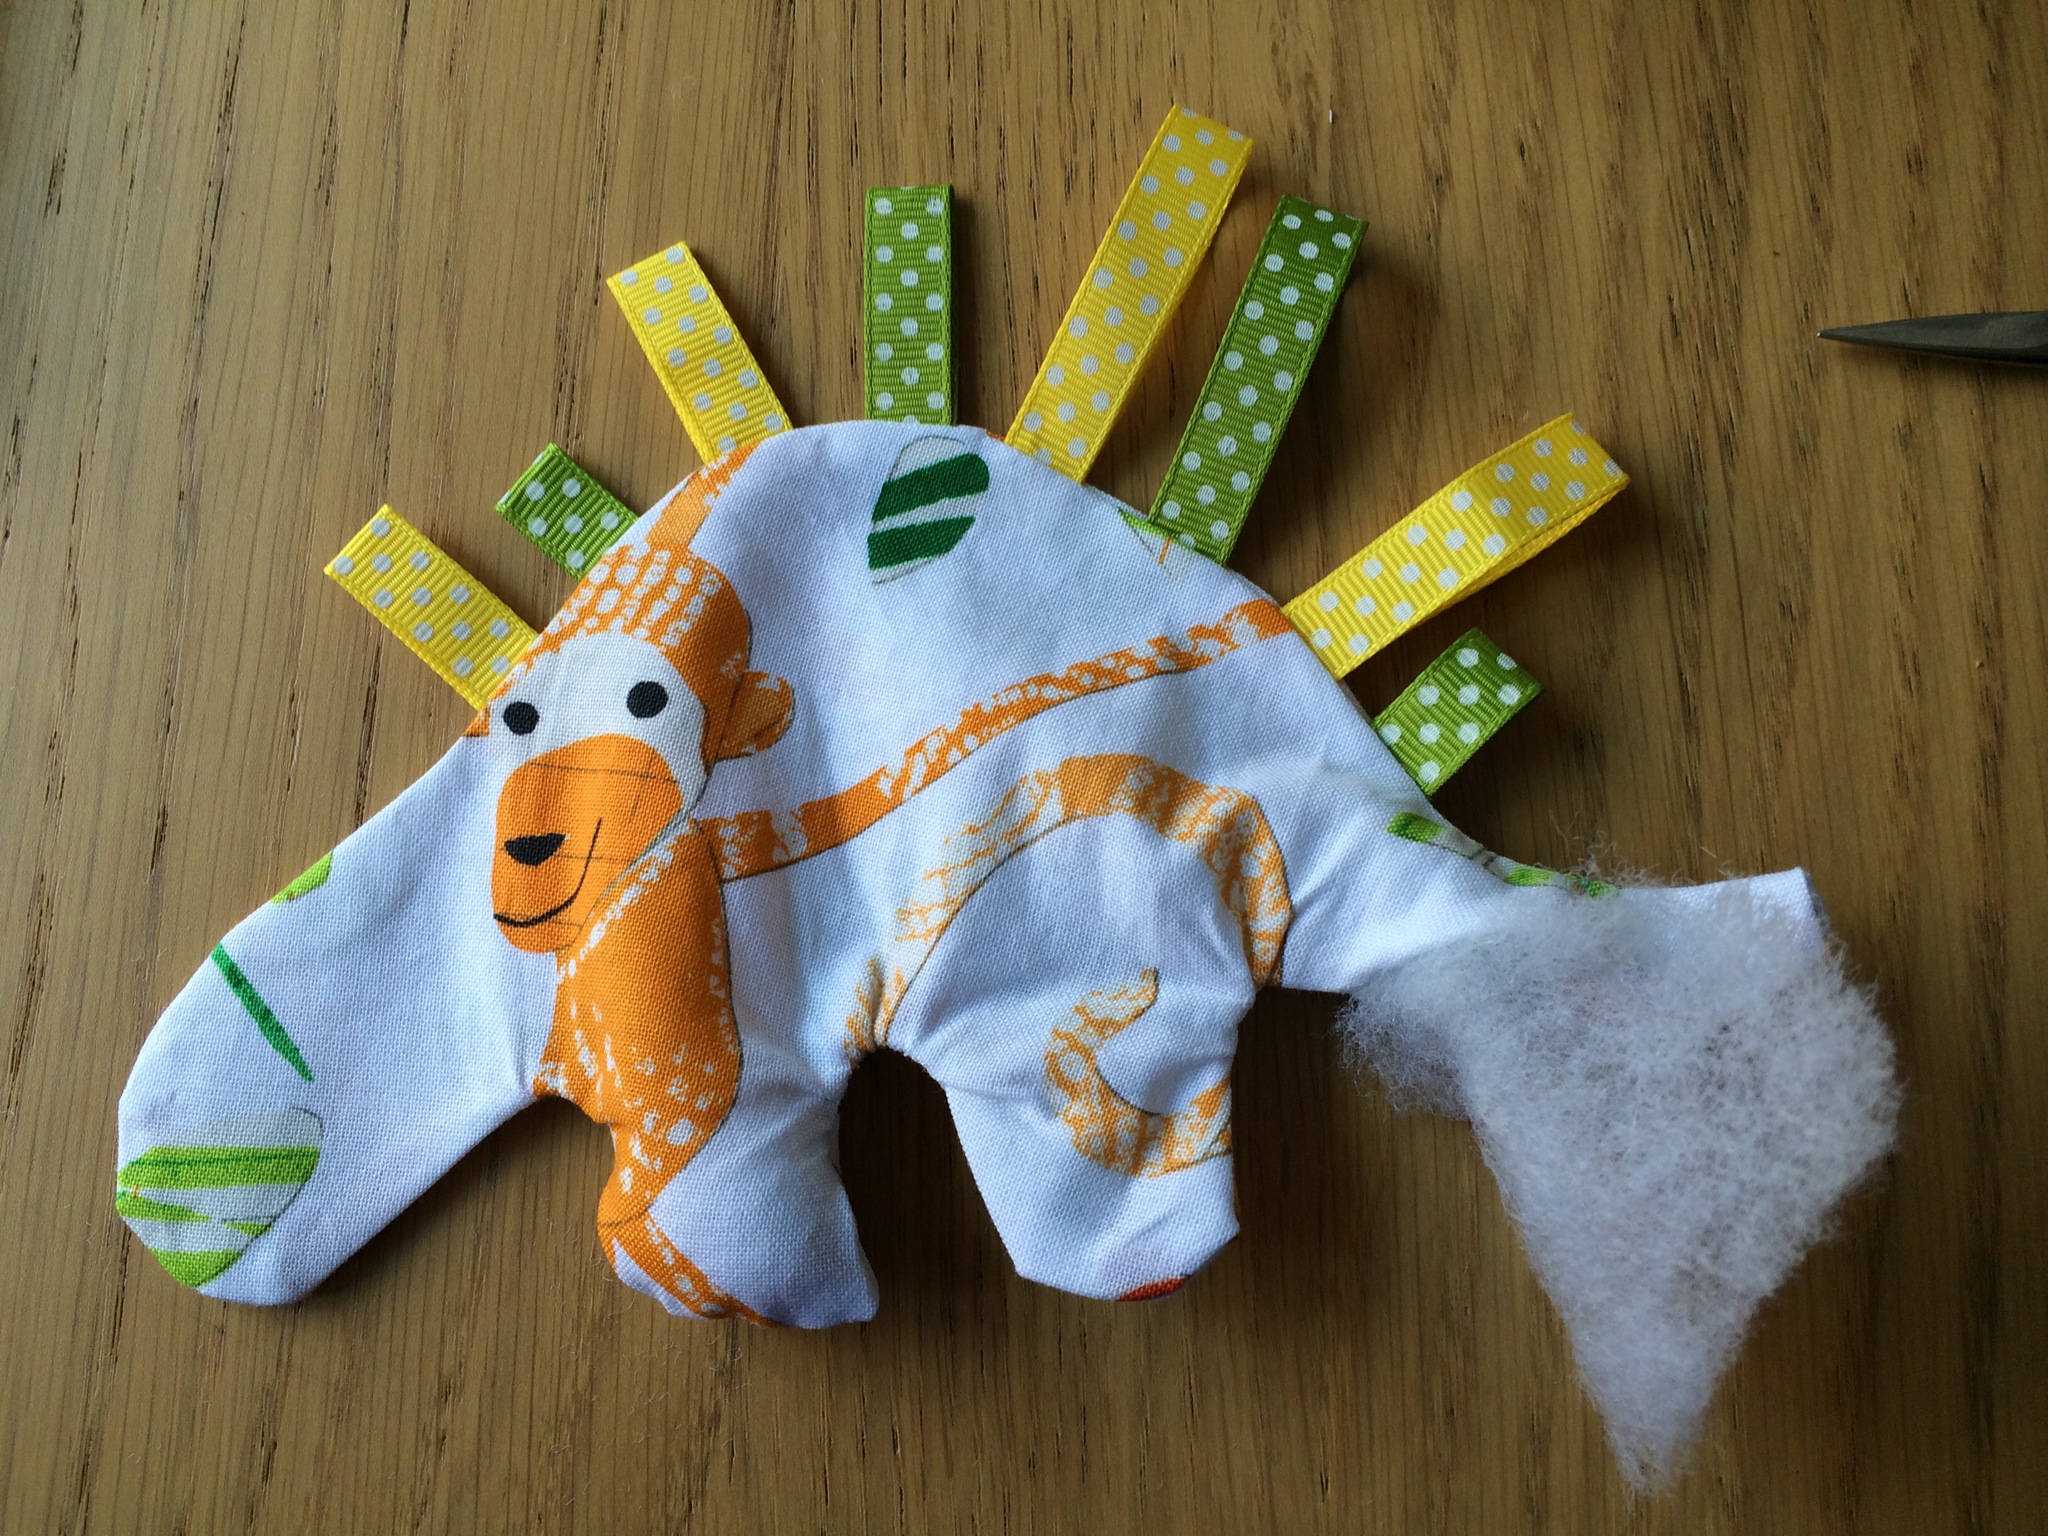
It’s surprising how much stuffing something so small can take, and it was hard to know whether it would end up being unevenly hard or squishier in certain places. I continued inserting stuffing until I thought it seemed full, then pinned it ready to hand sew the opening closed.

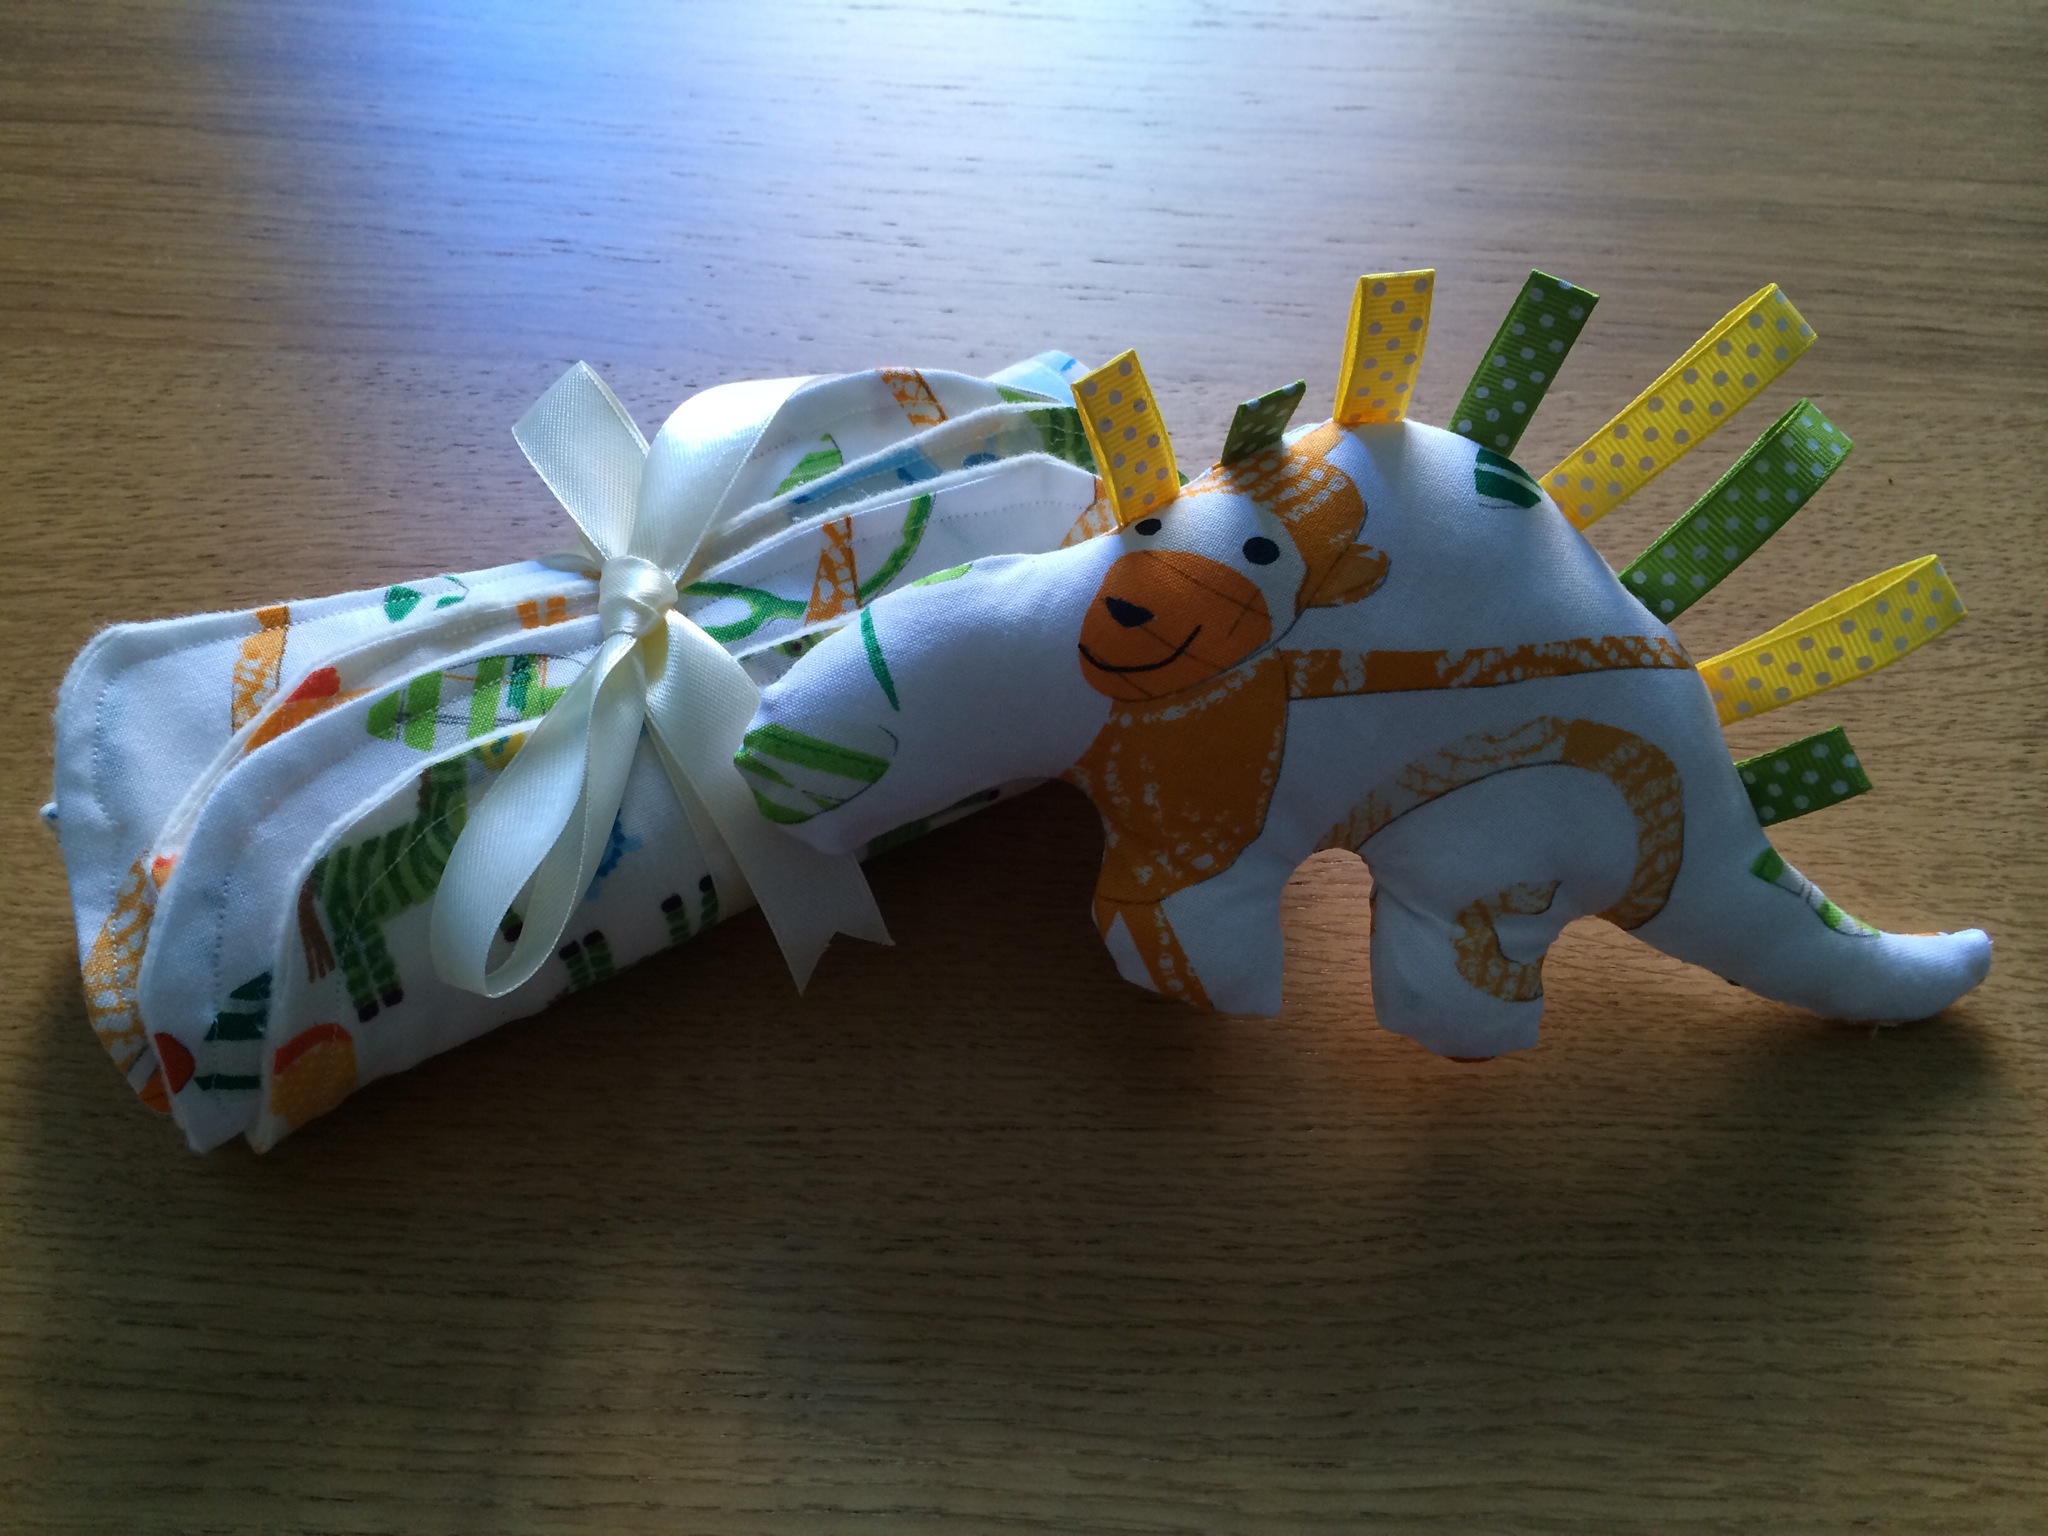
I used ladder stitch (I think) to try and close the gap neatly but tightly. Here he is.

What an amazing idea! I’m going to have to try that sometime. What a great dinosaur 😀
LikeLike
Oh my gosh! It’s adorable
LikeLike